Workflows and automation
Available in:BasicAdvancedTeam
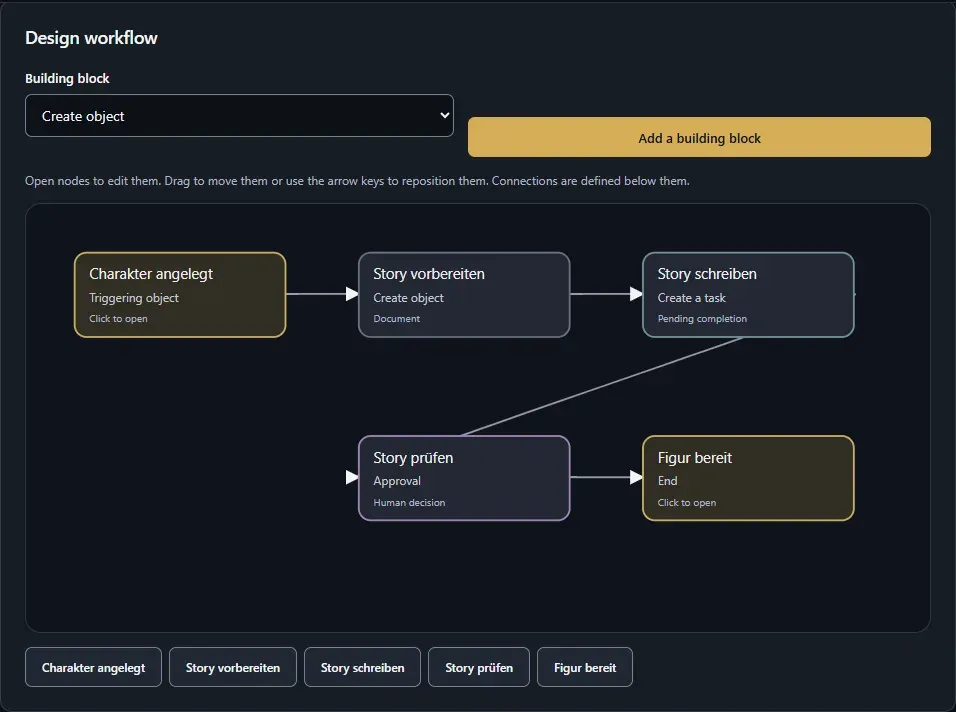
Under Production → Workflows you connect recurring processes. For example, when a new character is created, Ludarch automatically creates a story document, a writing task and, at the end, an approval. The page has three tabs: Workflows, Automations and Runs.
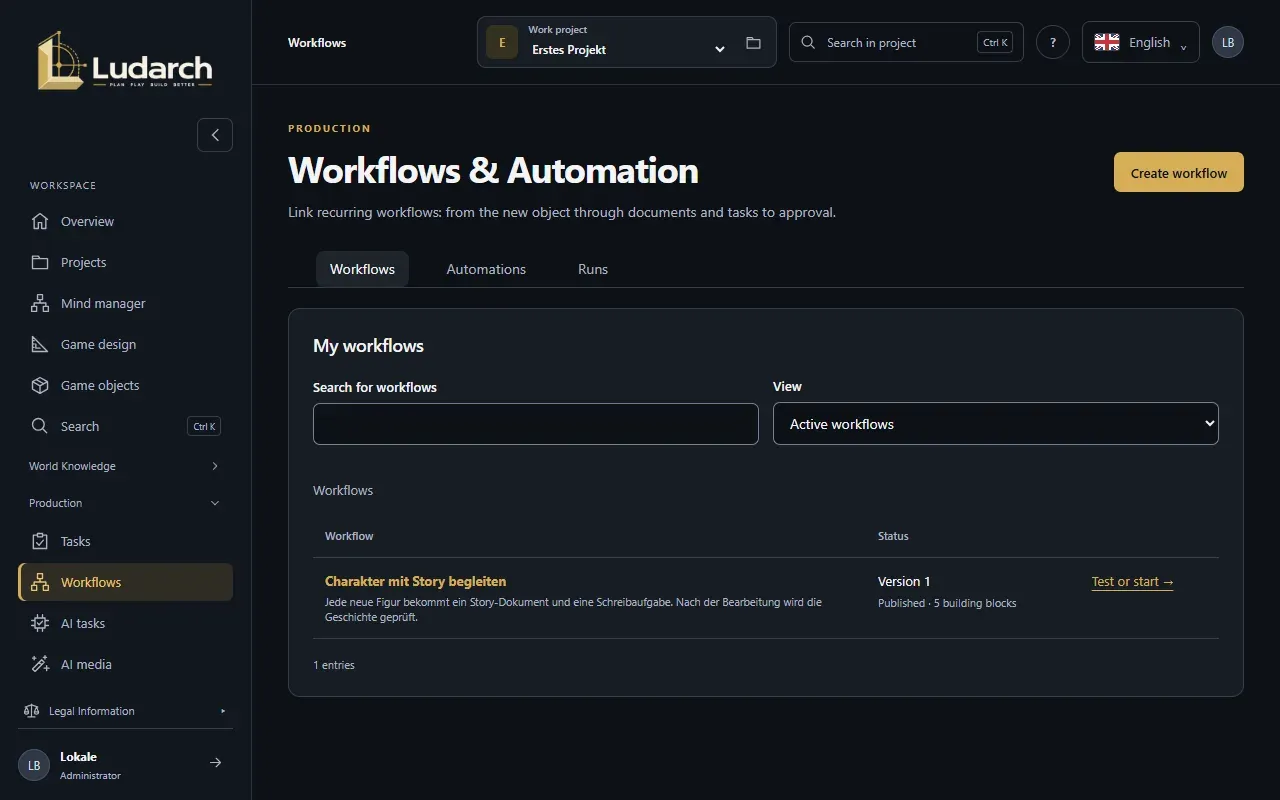
Project administrators can set up, publish and start workflows. Everyone else can see workflows, runs and results. The entry appears when the project has ticked the area Workflows under Sections in the navigation (see Projects).
Create a workflow
Section titled “Create a workflow”- Click Create workflow.
- Under Start with a template, choose a Template — for example Character → Story → Task → Approval — and click Apply template. Or start with Empty workflow.
- Under Describe the workflow, enter the Workflow name and its purpose.
- Under Design workflow, lay out the steps: choose a Building block and click Add a building block.
- Click a building block to set it up. Connect the building blocks under Connections with From, Output, To and Connect.
- Click Check workflow. Ludarch shows Process valid or a list of errors.
- Click Save & back to list.
The building blocks
Section titled “The building blocks”| Building block | What it does |
|---|---|
| Triggering object | The start: the object the workflow runs for. |
| Create object | Creates a document, a character, a location, a chapter, a scene, an arrangement or a video sequence. In the title, {{title}} inserts the name of the source object. |
| Create a task | Creates a task with priority, person responsible and due date. If you like, the workflow waits until the task is done. |
| Approval | A person decides whether the workflow continues. |
| Condition | Branches into Yes and No based on a field of the object, for example its review status. |
| Parallel group | Runs several steps at the same time. |
| Sub-workflow | Starts another published workflow. |
| AI task suggestions | Lets an AI suggest tasks from a culture dossier. |
| End | The end of the workflow. |
On the canvas you move building blocks with the mouse, or with Tab and the arrow keys.
Publish
Section titled “Publish”A saved workflow starts out as a Draft. Open it and click Publish version. Only published versions can be started. Later changes become a draft and a new version again. Open older versions with View saved version.
Test or start
Section titled “Test or start”- On the published workflow, click Test or start.
- Choose the Published version, and under Source object use Select object to pick the object the workflow should run for.
- Choose the Mode:
- Test without content changes or model calls — shows the flow, but creates nothing and calls no AI.
- Execute workflow — really creates the planned objects and tasks.
- If the workflow has AI steps, choose the Text provider for AI steps.
- Tick the confirmation box and click Start test run or Start workflow.
Start automatically
Section titled “Start automatically”Under Automations you set up a workflow to start on its own.
- On the workflow, click Set up automation.
- Enter the Name of the automation and choose under Started by:
- An event in the portal — for example Object created for the object type Character,
- A schedule — on selected weekdays at a set time, or at fixed intervals.
- Under Limits and preparation, set the Maximum total starts and, for AI steps, an overall budget.
- Click Save & back to overview. A new automation starts out paused.
- On the Automations tab, click Enable.
Pause stops the automation for now, End switches it off for good. It only reacts to new events; anything that happens during a pause is not caught up. Objects that a workflow creates itself do not start further automations.
Follow runs
Section titled “Follow runs”The Runs tab shows every run with its progress. Click a run to open it:
- Steps shows every step with its state and a link to the object it created.
- At an Approval, click Approve & continue or Decline & cancel.
- If a step is waiting for a task, it continues by itself as soon as the task is set to Done on the board.
- Pause, Continue and Abort run control the run. Anything already created is kept.