
Video: shot lists and production
Available in:BasicAdvancedTeam
For videos — such as trailers, intros or cutscenes — there are two pages under Production:
- Video & Shot Lists plans a video: briefing, shot list and result videos.
- Video production carries it out: sequences and storyboards, takes and edited versions.
Both appear when the project has ticked the area Video & Storyboard under Sections in the navigation (see Projects). Ludarch does not render videos; it keeps a traceable record of planning, footage and editing.
Create a video project
Section titled “Create a video project”- Open Video & Shot Lists and click Create video project.
- In the Briefing, enter the Title, a Brief description and the Production status (Draft, In progress, Under review, Done).
- Under Video briefing, describe the goal, target audience, story, visual style and the result you want.
- Under Domain Knowledge & Game Objects and Links, link matching entries and, if available, Result videos from the media library.
- Click Create & back to list.
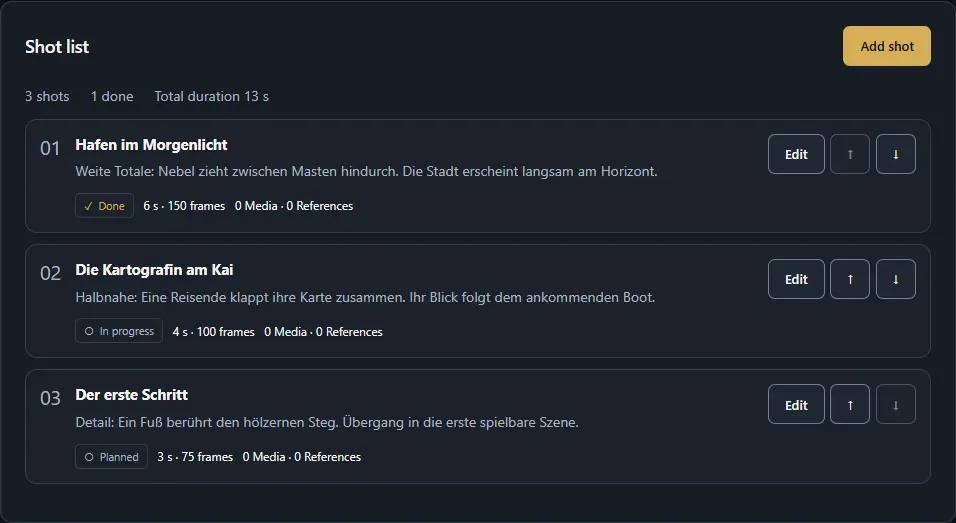
Shot list
Section titled “Shot list”- Under Shot list, click Add shot.
- Enter the Shot title and the Visual concept / Director’s note, and choose the Shot status and the Duration in frames with the Frame rate.
- If you like, add Reference media.
- Click Include in the shot list.
Reorder shots by dragging or with ↑ and ↓. The summary shows the number of shots, how many are finished and the total duration. Then save the project with a reason for change. Every save becomes a version that you can compare and bring back on the Versions tab.
Video production
Section titled “Video production”In a saved video project, Storyboards, Takes & Edited Versions takes you to Video production. It has three tabs.
Sequences & storyboards
Section titled “Sequences & storyboards”Create a Video sequence, choose the Video project and write the Script / Sequence. Under Storyboard images, choose images from the media library and order them with ← and →.
A Take is a recording: choose the Sequence, the Shot from the shot list and a Source medium (video or still image). Add the Source Start (Frames), the Take duration (frames) and Director’s and take notes.
Edited versions
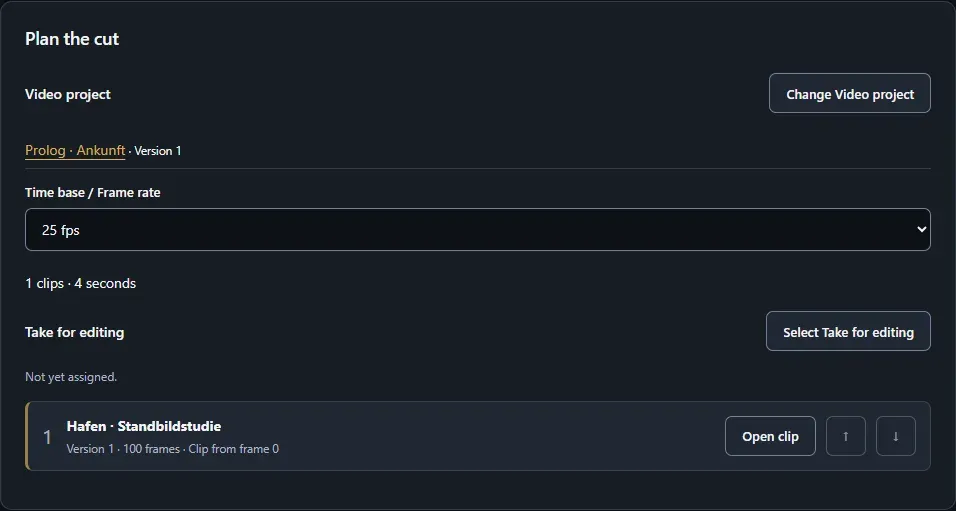
Section titled “Edited versions”- Create an Edited version, and choose the Video project and the Time base / Frame rate.
- Under Take for editing, add clips and order them by dragging or with ↑ and ↓.
- With Open clip, set the start within the take, the duration and an Editing note.
- Save.
- Under Animatic & Exchange, View animatic plays all clips one after another. Export to OTIO passes the edit on to editing programs.
Timed comments
Section titled “Timed comments”For a review, click Add a time comment, enter From Frame, Up to Frame and the Comment, and save. Mark resolved comments with Mark as complete.