
Narrative and dialogue
Available in:BasicAdvancedTeam
Under World Knowledge → Narratives & Dialogues you develop your game’s story: from characters and locations through chapters and scenes to playable, branching dialogues. The entry appears when the project has ticked the area Narratives & Dialogues under Sections in the navigation (see Projects).
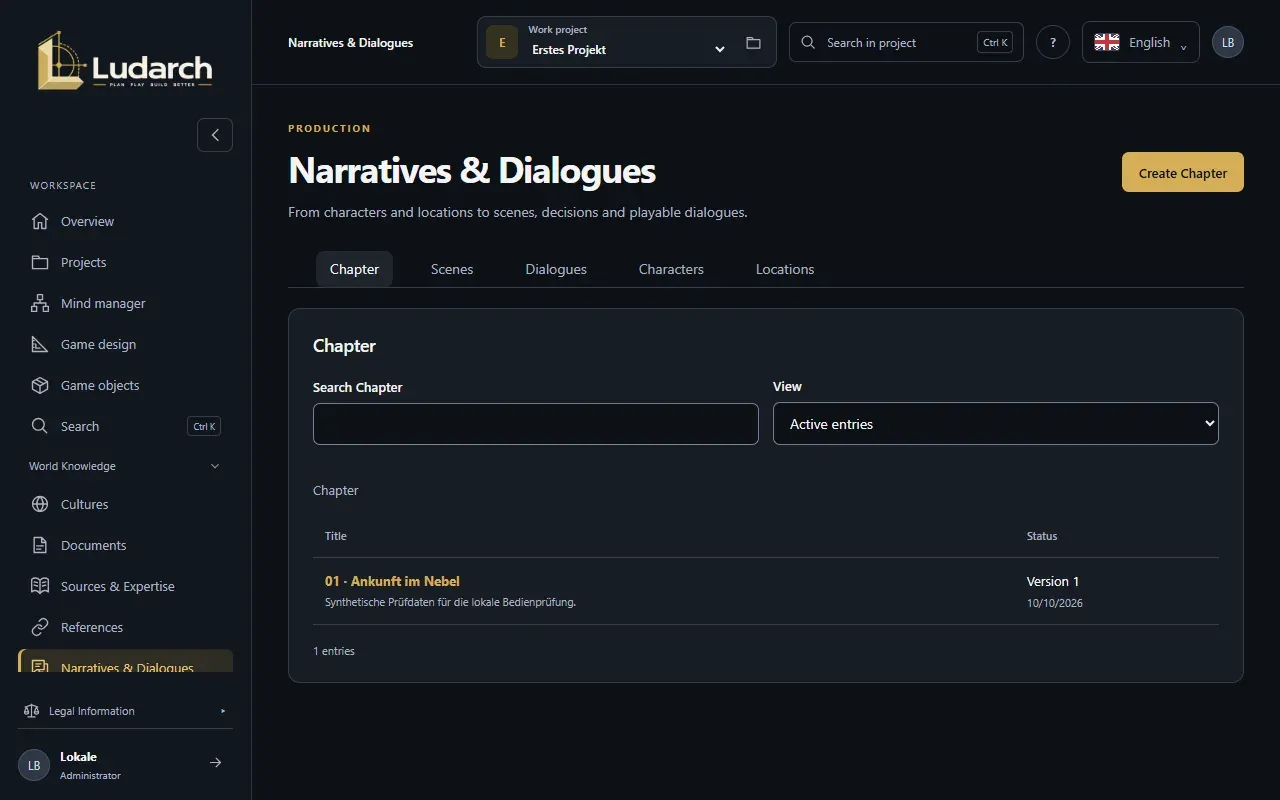
The five sections
Section titled “The five sections”At the top, choose Chapter, Scenes, Dialogues, Characters or Locations. Each section has its own list with a search and the View options Active entries, Archive or All entries.
An order that works well:
- Create Characters — with biography, motivation and relationships.
- Create Locations — with description and atmosphere.
- Create Chapter entries, summarise the plot and set the Order.
- Create Scenes: choose the chapter, setting and characters involved, and write the scene text.
- Build Dialogues for the scenes.
Create an entry
Section titled “Create an entry”- Choose the section and click Create character (or Create location, Create chapter, Create scene or Create dialogue).
- In the Overview area, enter the Title and a Brief description.
- Fill in the fields for the type — for scenes, for example, Select chapter, Select setting and Select characters.
- Under Domain Knowledge & Game Objects, link matching entries with Link entry.
- Click Create & back to list or Create & create more.
Build a dialogue
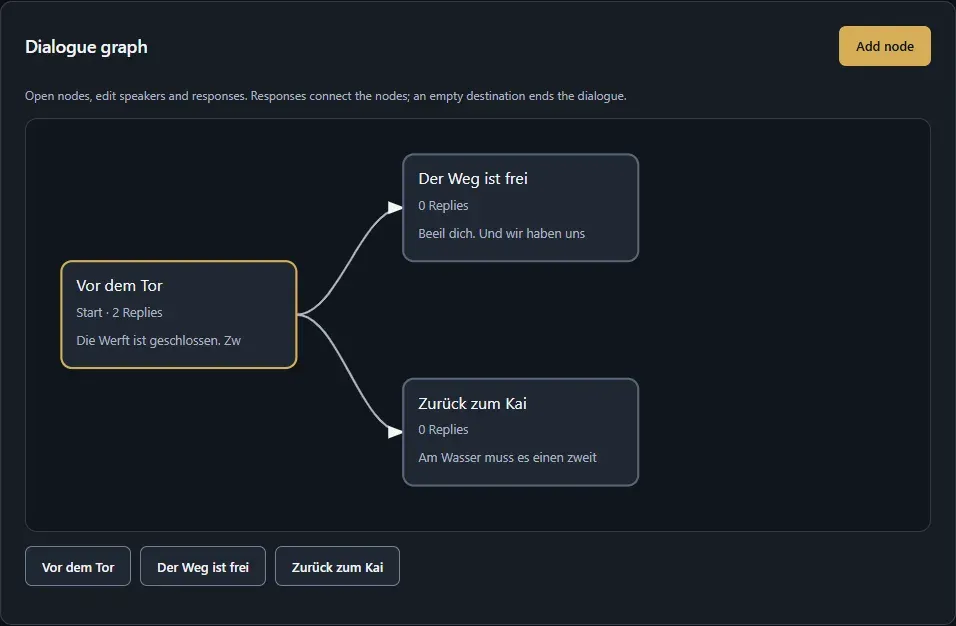
Section titled “Build a dialogue”A dialogue is made of nodes (what is said) and replies that lead to the next node.
- Create a dialogue and choose the scene under Dialogue context.
- On the Dialogue graph tab, click Add node. The first node automatically becomes the start node.
- Click a node. Enter the Node title and the Spoken text, and choose a character with Select speaker.
- Click Add a reply, write the reply and choose the next node under Continue to — or End dialogue.
- Back to the graph shows the whole flow with its arrows.
- Click Save & back to list.
Game state, conditions and effects
Section titled “Game state, conditions and effects”With variables, the dialogue reacts to the state of the game.
- On the Game state tab, click Add variable. Enter a Variable name (for example
gold), choose the Data type — Yes / No, Number or Text — and the Initial value, and click Apply variable. - Open a node. Below a reply, use Add condition to set when the reply is offered — for example gold greater than or equal to 2.
- Use Add effect to set what the reply changes — for example set zutritt to Yes or add a value to gold.
Test a dialogue
Section titled “Test a dialogue”On the Simulation tab, click Start simulation and play through the dialogue without saving. You see the current node, the available replies, the values of all variables and the history of decisions. Undo last decision goes back one step. The simulation does not change any project data, so readers can use it too.
Translate a dialogue
Section titled “Translate a dialogue”On the Translations tab, choose the Target language and a text, and enter the Translation. If the original text changes later, Ludarch marks the translation for review; confirm it with Accept translation after checking. Export texts downloads all texts as a JSON file.
Versions and archive
Section titled “Versions and archive”- Every save becomes a new version. The Versions tab shows them all. An old version opens read-only, and you can bring it back with Apply as draft.
- Store in the archive takes an entry off the active list.
- To the trash … removes it. You can restore it from the trash.